• Models
  • Contests
  • Slicer
  • Login
  • Start Here
    thingiverse-iconprintables-iconcults3d-iconmakerworld-iconmyminifactory-icon

    3D GO

    3D ModelsContestsCollectionsSaved ModelsOn a mobile device?

3D GO

Privacy Policy
Storage Evolution 3D Printer File Image 1
Storage Evolution 3D Printer File Image 2
Storage Evolution 3D Printer File Image 3
Storage Evolution 3D Printer File Image 4
Storage Evolution 3D Printer File Thumbnail 1
Storage Evolution 3D Printer File Thumbnail 2
Storage Evolution 3D Printer File Thumbnail 3
Storage Evolution 3D Printer File Thumbnail 4

Storage Evolution

Max Siebenschläfer avatarMax Siebenschläfer

January 5, 2023

printables-icon
DescriptionCommentsTags

Description

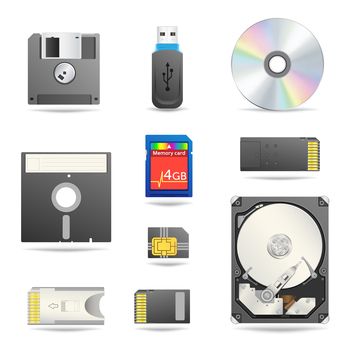
Check out my video. It was a really cool project for me. I was instired by this T-Shirt https://www.getdigital.de/Speicherevolution.html. (You also can find the t-shirt in the project as an image). So I thought why shouldn't I build this thing in real life with real objects. I hope you enjoy this Instractable and have fun to build it. Let me know in the comments what you think or if you have any questions? Thank you for reading.

Watch the Video


Look Which Component You Want to Get!


I used the t-shirt as a refernece so I only used the components from the t-shirt, but you also can use a cd or a dvd. I think you can find every component pretty easy besides the floppy disk and the flex disk. For me it was easy to find this componets because my school wanted to throw them away ;)

flex disk

floppy disk

3D Print the Last Part

If you want to use the cloud symbol the use the stl file I provide. Or go to my thingiverse profile and downlaod the file there.


Cut the Paper Template

You have to cut a paper template with holes of the size from your compontes. The complete size should be the size of the wood plate you use. Take tape and glue the template to the wood. This is for a perfect alignemt.

Glue the Componts Onto the Wood

Now heat the hot glue and glue the components at their place onto the wood. You can also use a diferenet glue but hot glue worked perfect.

Drill the Hock In


The last step we do. Gimlet a small hole with a small drill and after that you can drill the hocks in. We gimleted the holes before, that the wood won't break. Now take a string with the perfect length for you. Now you can put this pice of art on your wall.

Conclusion

So far for me this projct was really funny and I learned some insterresting things about wood working. Maybe you also learned or will learn something. Thank you for reading my instruction.

YouTube

Etsy

If you like to, check out my other designs too!

License:

Creative Commons — Attribution — Share Alike

Related Models

V29 preview image

V29

jzisa profile image

jzisa

81,427

Draw-A-Cat! Stencil for Feline Design preview image

Draw-A-Cat! Stencil for Feline Design

Studio Meshco profile image

Studio Meshco

107

STAND QRCODE/NFC CARD GOOGLE REVIEWS EDITABLE preview image

STAND QRCODE/NFC CARD GOOGLE REVIEWS EDITABLE

ARTIGIANO PAZZO profile image

ARTIGIANO PAZZO

1,742

Cute Mini Octopus preview image

Cute Mini Octopus

McGybeer profile image

McGybeer

75,807

Palestinian Map In Geometric Pattern Design - 2 Parts preview image

Palestinian Map In Geometric Pattern Design - 2 Parts

PALIprints3D profile image

PALIprints3D

20

Dual Text Illusion v2.0 preview image

Dual Text Illusion v2.0

neverland forge profile image

neverland forge

1,390

Modular Mounting System preview image

Modular Mounting System

HeyVye profile image

HeyVye

69,159

Design for a pipe in two pieces - UPDATED AGAIN preview image

Design for a pipe in two pieces - UPDATED AGAIN

Fergy7 profile image

Fergy7

1