


December 18, 2017
Description
This project is a complete overhaul of the original Wanhao i3 with a few main objectives:
The Wanhao i3 is a fabulous printer, but new generations of printers have begun pushing the boundaries. It has become apparent that in comparison, the Wanhao has a few deficiencies. Deficiencies which we will address in this project. The key improvements of this upgrade include:
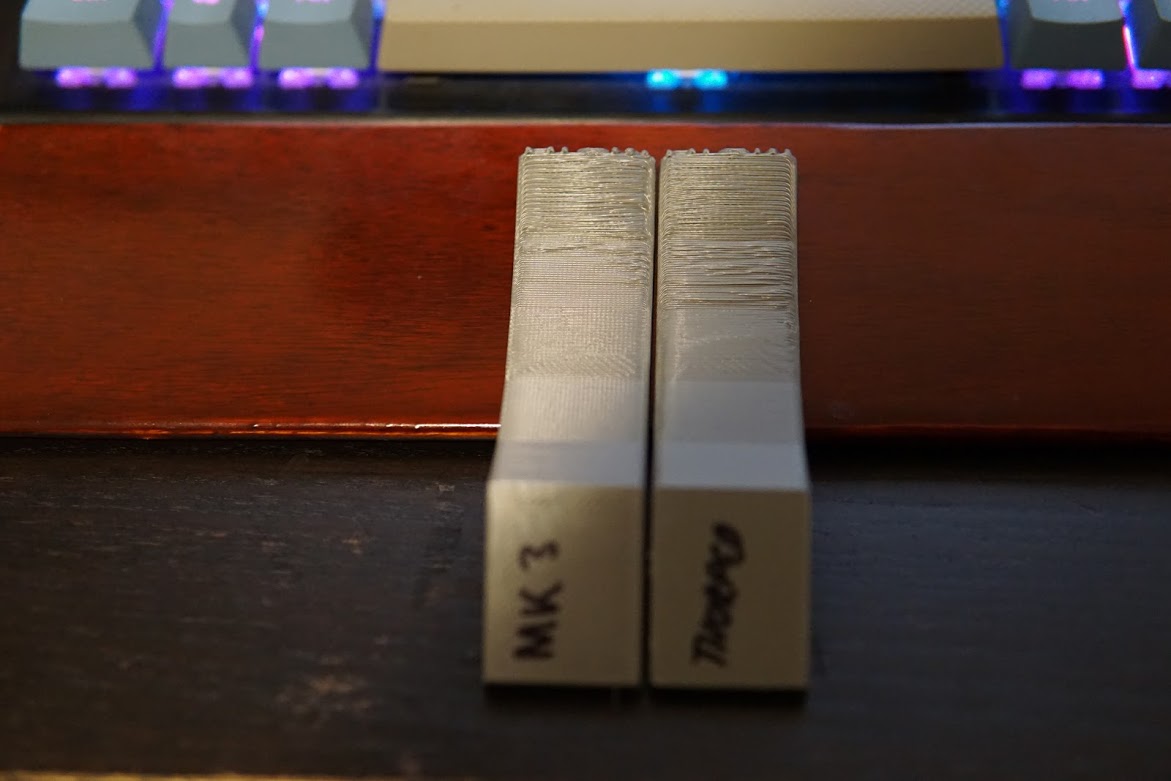
Sample Print @100mm/s on the titan aero extruder.
Sample of improved print quality. 0.24mm layer height @ 70mm/s (titan aero).
This project will be maintained both at github and at thingiverse.
The files were created using a combination of Fusion360 and tinkercad. They can be viewed and edited via this Tinkercad link.
After its recent update, Thingiverse no longer displays markup language properly. Please go to github or riganti.com for complete instructions.
Total BOM is approx 100-150USD. However this is highly dependent on what you have laying around, where you source your parts from, what you want to carry over, and where in the world you are. A lot of my costs in Australia were shipping related.
I recommend Misumi for the core parts and will provide part numbers for each of those. Misumi regularly have a 30% off code for first time orders, which helps to keep costs down. For everything else cheap Ebay / Aliexpress parts will do. Many of the printed parts are designed around the Misumi plate bracket hole spacings. If you can’t source these parts (as misumi can be a pain to order from if you are outside of the US), I have another Thingiverse remix filled with tabbed printed brackets. These definitely won't be as strong or sturdy as the proper metal braces however.
| Part | Description | Number Reqd |
| --------------------- | ---------------------------------------- | ---------------------------------- |
| 3030 Extrusion 355mm | Z Axis HFSLB6-3030-355 | 2 |
| 3030 Extrusion 350mm | Y Axis HFSLB6-3030-350 | 2 |
| 3030 Extrusion 380mm | X Axis Tower HFSLB6-3030-380 | 2 |
| 3030 Extrusion 258mm | X Axis Base HFSLB6-3030-258 | 2 |
| 30x30x35 Corner Brackets | Tabbed on SINGLE Side only HBLFSNB6 | 14 |
| Alluminium Flat bracket | 4 mount holes HPTLS6 | 8 |
| LM8UU Bearings | Std 8mm 15mm long bearings LMU8 | 4 |
| M5 12mm | Button Head Screw M5 | 70 |
| M5 16mm | Button Head Screw M5 | 10 |
| M5 T-Nuts | 3030 T-Nuts Drop in preferred | 80 |
| M5 20-25mm | Low Profile Button head (less than 4.2mm) | 1 |
| M5 30-35mm | Screw M5 | 1 |
| M3 Heatserts | Brass heat inserts M3 thread M3-UHBRHESF | 22 |
| M3 4-8mm | Button Head Screw M3 | 8 |
| M3 12mm | Button Head Screw M3 | 6 |
| M3 16mm | Button Head Screw M3 | 6 |
| M3 30mm | Screw M3 | 3 |
| M3 6-8mm | Countersunk M3 | 4 |
| M3 6-12mm | Countersunk M3 | 8 |
| M5 Nylock | Nuts for Idlers | 2 |
| M3 Nylock | Nut for part cooling and heat sert substitute | 1 - 15 |
| M5 Smooth Idler Pulley | (Optional) 9mm wide replacement | 2 |
| M5 Fibrous Washers | For idler Pulleys | 3 - 10 |
| GT2 Belt | 6mm belt | 1m |
| 50mm Blower | Part Cooling | 1 |
A Wanhao i3 Duh! (these parts will also allow you to upgrade most other prusa style printers, just adjust the lengths of your printer compared to the Wanhao’s smooth rods (X=320mm Z=320mm Y=380mm)
Various 3030 T-slot Aluminium Extrusions
14x Corner Brackets 30x30x25 - Importantly these should be reversible or only be tabbed on one side! We are stacking two extrusions perpendicular on top of eachother. If they are fully tabbed on both sides they will NOT fit. HBLFSNB6 with low profile T-nuts or the single tabbed version HBLFSNK6.
8x Aluminium Corner plates with 4 mounting holes. The legs and printed corner parts are all based on the misumi hole spacing HPTLS6.
4x LM8UU Bearings. These replace the stock Z bearings. It is also worthwhile purchasing some of the longer LM8LUU bearing to replace the X and Y axises if you are coming from a pre 2.1 wanhao. These misumi ones are much higher quality than the originals. LMU8, LMUW8.
70x M5 12mm Button head screws
10x M5 16mm Button head screws
80 M5 T-Nuts. Drop in T-nuts are recommended as they are easier to work with. Some drop in T-Nuts have a longer neck which can cause issues with the Misumi HBLFSNB6 corner brackets. One side of the bracket is protruded, so that even when screwed in very tightly they don't apply enough compression force to secure the frame. In this case 14 T-nuts can be substituted with flat style ones, or pieces of fibre washers can be glued into the grooved areas to reduce the protrusion depth. Misumi also have t-nuts designed specifically for this bracket HNTT6-5. 14 of these can be used.
1x M5 20-25 mm Button Head screw (low profile) The head needs to be 4.2mm or less long as this sits between the idler part and the leadscrew.
1x M5 30-35mm screw
22x M3 Heat-sert Brass inserts (M3-UHBRHESF) W4.4mm x H5.8mm or similar. These are set into parts using a hot soldering iron and are great for making strong functional parts without having to worry about screw threads stripping over time. Proper thermal inserts are recommended, but the easier to source injection molding type ones should work almost as well.
7x 4-8mm M3 Button head
6x 12mm M3 Button head
6x 16mm M3 Button head
3x 30mm M3 screw
4x 6-8mm M3 countersunk
8x 6-12mm countersunk (for leadscrew nuts) you also may want to secure these with nylocks m3 x8
2x M5 Nylock nut
1x M3 Nylock for part cooling bracket. 6 more can be used as a substitute for the extruder assembly if Heat-serts cannot be found.
Some fasteners are carried across from the Wanhao. This includes the hotend screws, and the M4 x-carriage screws.
(Optional) 2x M5 Smooth Idler Pulleys. The original Wanhao pulleys are prone to failure over time and are 11mm wide. i recommend switching them out with new ones while doing this mod. Most replecement ones are 9mm wide which allows you to use the X Gantry Idler 9MM part instead of the X Gantry Idler 11mm (Stock idler) part. The 9mm version has thicker walls which should make it more durable over time.
3-10 M5 washers (Steel or fibrous). Used to secure the X and Y idlers. Variable number required depending on their thickness and whether you are using stock idlers or the usually thinner aftermarket ones.
1 Meter of GT2 6mm belt. The X carriage distances are increased and the stock belt may not be long enough. aprox 770mm is required.
50mm Blower Fan. Hopefully you should already have one of these in your arsenal as they make a huge improvement to print quality
Notes:
Substitute with HFSL6-3030 if you would like non anodized silver
HFS-3030 (Standard) or any other type of 3030 can be substituted instead.
I recommend ABS or an ABS composite if you have an enclosure or if your printer can produce prints with minimal warping. ABS was chosen as this is what the Prusa MK2s was manufactured with. As of the MK3, Prusa is using PETG which is also fantastic choice. Otherwise PLA may work except for the extruder carriage parts.
If using ABS please allow for a few percent of shrinkage. This is especially important for the feet parts, which need to be exactly level with the underside crossbeam.
Recommended 40-60% infill and 3-4 outer shells for maximum strength.
These parts make use of brass heat inserts in order to make the strongest prints in the space available. They are installed with a soldering iron. Slowly push the insert into the hole while being careful to keep it as square as possible. Use an Xacto blade to clear the surrounding area of any excess plastic.
These inserts are used on the following parts.
You will need multiple copies of the following parts:
Most parts can be printed without issue. Supports should not be required in most cases. However some parts are a little trickier and may benefit from a brim to ensure they print flat. This includes:
A few decisions will need to be made before assembly.
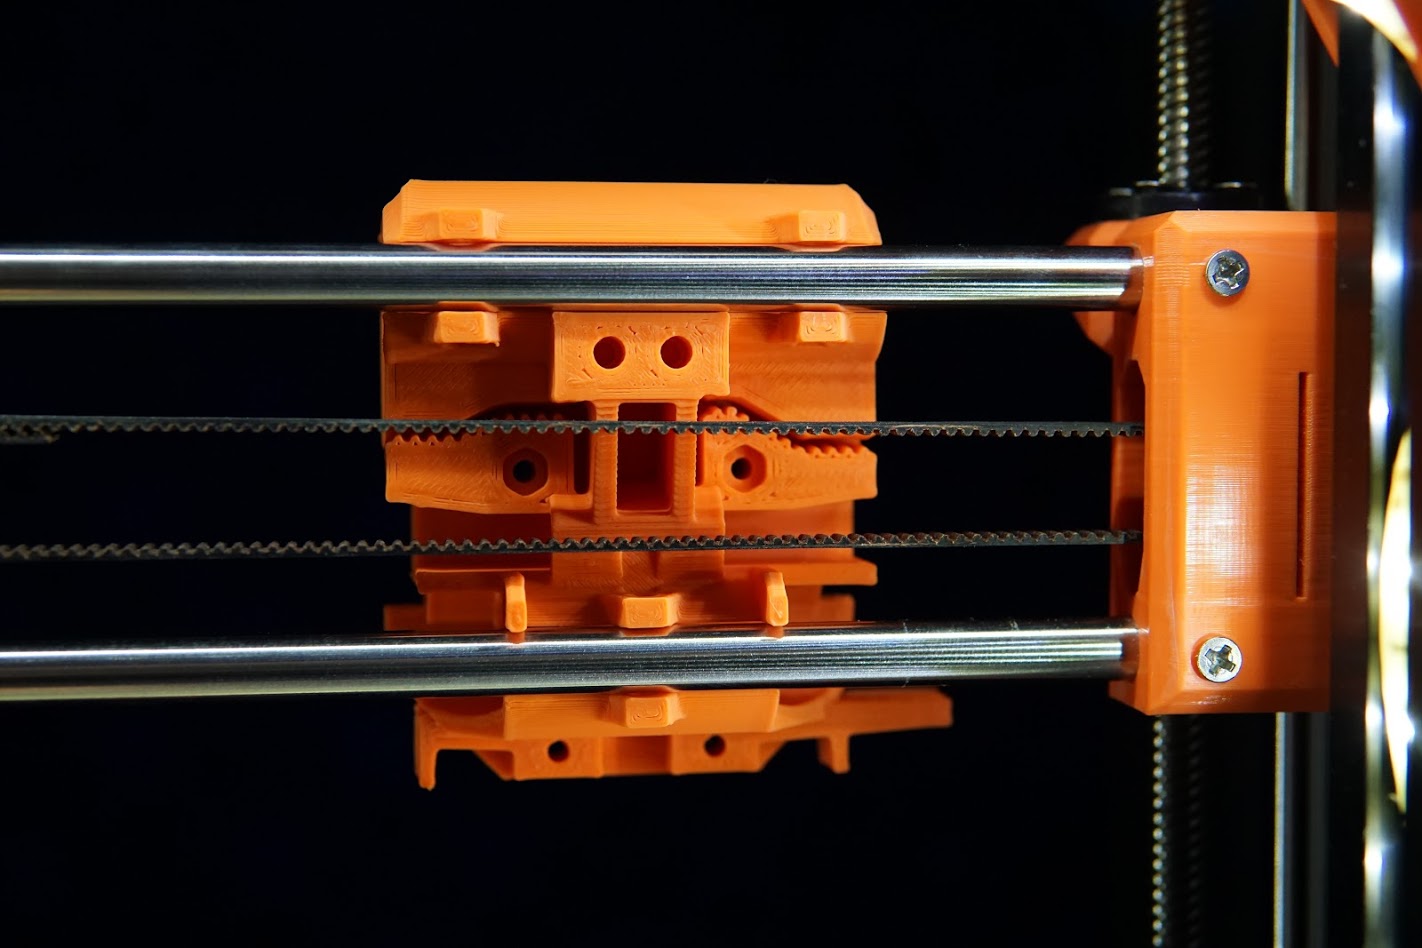
The tower top corner bracket is available in 2 forms. Tower Corner Bracket Large 80x80x5 V1 X2 parts are the ones in the photos, and Tower Corner Bracket Large 80x80x5 V2 (Better Z Clearance) X2 parts provide better z clearance.
If you use the stock idler pulleys you will need to use X Gantry Idler 11mm (Stock idler). If using a replacement 9mm idler, the X Gantry Idler 9MM part can be used which should be stronger.
if you have no access to Misumi parts it is possible to either:
Finally the printer can be assembled in two different ways. It can be assembled as outlined here with the vertical rods on the backside of the tower. The large brackets become the front face of the printer. Alternatively is can be assembled similar to the Prusa MK2s where the motors and rods face forward. The benefits of this include a slightly increased Z-height of ~210mm. However i don't have official cable routing for this version but a number of cable chain brackets are available in the Alternative & Optional Parts folder. Instructions are similar but you will need to recheck the placement of your z axis crossbeam and the extruder faces the opposite direction.
Original Configuration. CAD files available here
#Assembly
Full Assembly instructions are available on the Gitub wiki of this project Here
Good Luck!
1.0 - Initial Release
1.01 - Updated idler files with multiple z endstop mount points for upcoming Titan Aero upgrade. Sturdier cable cover box. Added 1Meter GT2 belt to BOM as the stock belt may not be long enough (can anyone confirm?)
1.02 - Updated the Part Fan Bracket to Part Fan Bracket V1.1 The original doesn't align with the carriage plates properly. Please print the revised one.
1.03 - Uploaded a new Y Carriage Belt Holder. This one is based on the current MK3 design and is much easier to fix and tension.
1.04 - X Gantry Idler 9MM V2 was missing the heat-sert insert holes to mount the cable box. Updated and fixed with X Gantry Idler 9MM V3. If you have already printed V2, you can keep the part and manually drill 2x 4mm holes spaced 9mm wide and 6mm deep.
1.1 - 11/03/2018 Major Prusa MK3 Update. This updates an update of many of the original MK2s based parts to MK3 Based parts. This includes;
MK3 Based Part Cooling shroud and mount. It performs much better than the original Thorped based one. flawless @60 degree overhang with some sagging @70 degree overhang. The original would show artefacts @60 degrees.. Almost comparable to the Dii Cooler.
Much improved X Carriage. This uses the new MK3 belt mounting method which is much easier to install under tension. The whole extruder assembly can now also easily slide on and off the rods to greatly simplify installation and maintenance. 16mm M3 screws are used to secure the bearings. I've also made and tested changes which allow the extruder assembly to be built without heat-serts and can be substituted with M3 nylocks. NOTE: due to these changes the Rear carriage plate is NOT compatible with the existing Front extruder plate as the hole spacing has been changed. The New Front extruder plate must be used.
Front Extruder Plate. Better spacing around the hotend to improve the filament path. Updating Hole Spacing to be compatible with the new Rear Carriage Plate. Strengthened BLTouch mount. Increase spacing around heater block to reduce residual heat. Not compatible with old extruder plate.
X Axis Motor Mount. Incorporates the new MK3 design. Better Spacing to ensure a straighter belt path. Includes new MK3 tensioner to easily tension X belt. Requires M3nS Nut and 20mm M3 screw. (Enough tension can be applied by without the M3nS) Installation is similar to the Prusa instructions here, steps 11-18.
As this project contains dozens of files already, Older retired files are retired to the Retired Versions directory in github
1.1.1 - Endstop Part For sensorless homing with TMC2130 Drivers.
1.2 - 05/11/2018 - Multiple improvements based on Prusa MK3 R3 release. This includes:
Prusa MK3 R3 based part cooling shroud. This gives a noticeable improvement over the original shroud. Also improved the clearance between the shroud and the nozzle.
Improved X Carriage rear plate. This was strengthend to better handle bumps and knocks. Rigidity is also improved. It is still a common part between the MK10 and titan aero extruders.
Strengthened Z Rod Securer parts. Some people had issues with these snapping in PLA but should no longer be an issue.
1.3 - 17/02/2020 - E3D Hemera mount. Updated fan duct to the most recent R4 release. Added an angle for increased rear fan duct clearance. This will filter down to the other hotend designs shortly. Initial update of parts across to fusion 360. A number of parts have been converted and this will continue over time.
Improved cable mounting system by clipping onto the X axis motor
1.3.1 - 19/02/2020 - MK52 Removeable heatbed Mod - resized rods and extrusions to accommodate the prusa MK3 heatbed.
1.4 - 05/08/2020 - Mk52 and Hemera Parts update. Significantly improved X idler, tensioner and motor holder, new Z Rod Holder design for much easier installations and accuracy. Improved Hemera fan shroud with improved airflow. Continued conversion from tincercad to F360 parts. These changes will filter down to the original reduplicator parts.
License:
Creative Commons - Attribution - Non-Commercial - Share Alike
 OmNomNomagon
.jpg&w=256&h=256&output=webp&q=100&n=40&default=https://cdn.thingiverse.com/assets/84/8a/af/6a/5b/1526170_1375918039400540_6059107188587688027_n(3).jpg "barspin profile image")


