May 26, 2017

Description
This is a Darrieus wind generator, which optionally can be extended with Savonius blades to a hybrid rotor.
The Savonius extension is very useful, since the Darrieus rotor has problems to start.
Take care that also vertical wind turbines require protection in case of strong winds.
Rotor
The rotor consists out of 3 NACA 0015 airfoils, which are extruded as helix with 4 parts each and an overall height of 80 cm.
Each of the 3 middle part of the helix blade requires the parts "helix blade" and "helix blade 2" clued together. I made good experience with 2-component adhesive with 5 minutes hardening, since it is difficult to fix the two pieces for a long time.
The blades are finally mounted to the blade holder with aluminium tubes with a length of 222 mm each. The drill tool helps to drill the holes with the right distance. Print 2 drill tools and put them over the tube. The distance of the hole center to the end of the tube is 20 mm on one side and 17 mm on the other side.
A collar fixes the two blade holders with the 20 mm shaft. Use 2-component adhesive to clue the collar with the blade holder. Take care that the headless screw of the collar fits into the small hole of the blade holder.
The blades are printed with PETG and 15% infill only to keep the blades as light as possible. 5 top- and bottom layers and 0.2 mm layer height. Support is useful for the pickups. PLA should work as well.
There are 2 versions of the helix blade, mid and large. I recommend to use the mid version, because of lower weight and it requires less filament.
** Update Feb. 12 2018**
I added a new blade to increase the radius of the rotor by 100 mm. Hence the length of the aluminium tubes is 322 mm. The 2 modifiers allow to reduce the overall weight of the rotor. The blades are printed with 2 perimeter only and 5% infill density. The modifiers with 20% infill density. With this, the weight of the blade part is reduced to less then 150 g.
Learn more about using modifiers in this blog: http://slic3r.org/blog/modifier-meshes
The blade_end_mid can also be used for this blade.
Generator
The air-cor coil generator is applying a Halbach array in order to get the best performance. The principles of the Halbach array can be found here: https://en.wikipedia.org/wiki/Halbach_array
For the stator coils I used copper wire with 0.75 mm diameter. I managed to coil up 35 turns per coil. Each phase has 8 coils which are connected in series. Use the coil tool to keep the area in front of the holes in the middle of the coil clear. 4 for the 1st phase and 2 for the 2nd phase.
I used cable ties to fix the wires of the coils. After all coiling up was finished, the hole stator was additionally fixed with spar varnish.
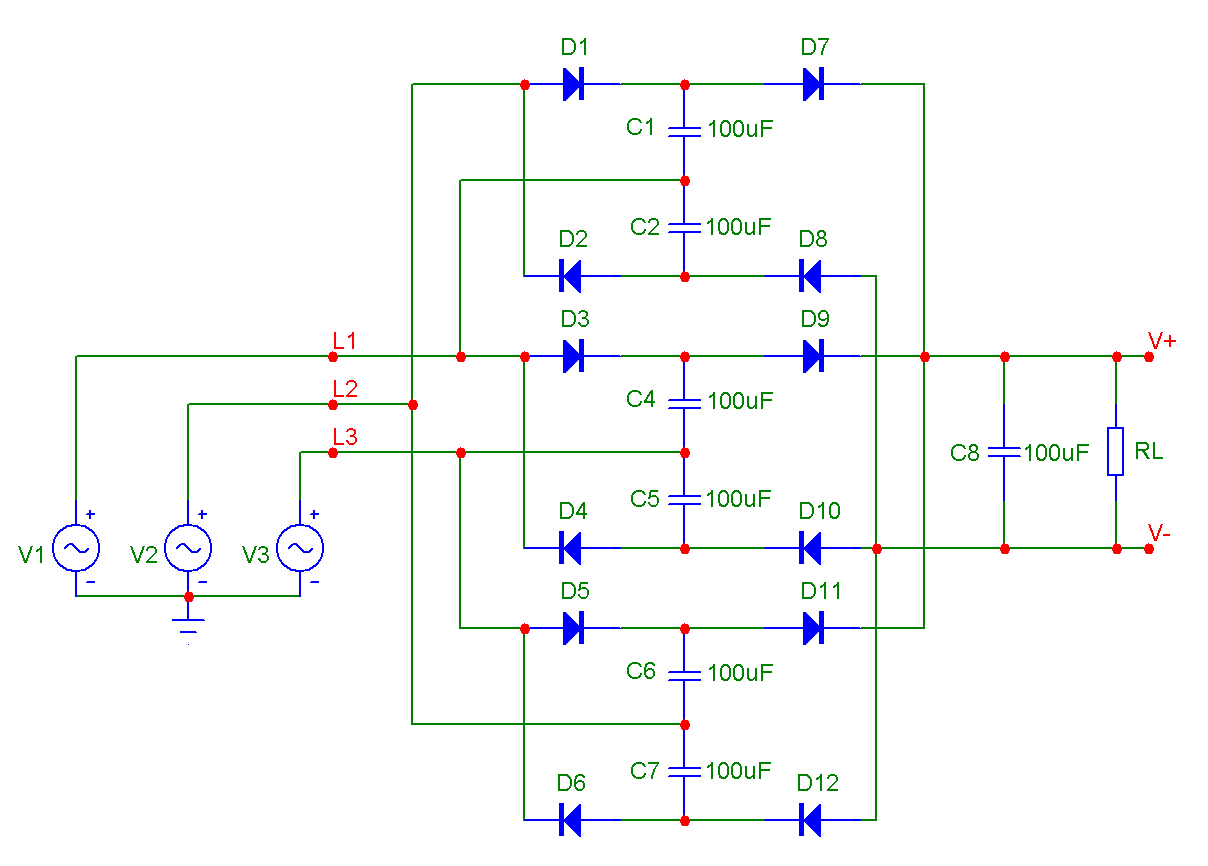
With moderate winds the generator delivers about 3.5 Volt AC per phase. Use a 3 phase rectifier followed by a DC-DC step up converter in order to achieve > 14 V as input to the battery charger. Take care that the step up converter is operating from 3 V onward. With stronger wind, like in the second video, the generator delivers more then 10 V AC. Due to the high wire cross section, the current is sufficient to supply the step up converter for high output power.
The weight of the rotor leads to the axial forces. Therefore I am using a roller bearing at the bottom of the generator. Roller bearings and ball bearings have different thickness. Hence the distance rings between the bearing and the rotor are also different. Of course it is also possible to use 2 roller bearings, but I am assuming they have a slightly higher resistance.
A collar fixes the rotor with the 20 mm shaft. Use 2-component adhesive to clue the collar with the rotor. Take care that the headless screw of the collar fits into the hole of the rotor.
All parts of the generator are printed with PETG and 25% infill.
** Update Apr. 29 2018**
A new part "nipple" was added to protect the generator from water intrusion. Clue this on top of the upper cover.
** Update March 15 2019**
It appears that the step-up converter generates a high load already at 3V. This prevents that the rotor reaches an efficient operation point. In order to avoid this, a threshold switch (about 6 V) should be inserted in the input line of the step up converter. Alternatively a voltage doubler as shown here https://www.mikrocontroller.net/attachment/93313/Verdreifacher_3-Phasig.png could be used. Or simply a wind MPTT charge controller with boost function.
Rod
I used a 40 x 3 mm Aluminium rod, but with 2 m length this one is oscillating until the rotor has reached a certain speed. Hence I recommend to use a 40 x 5 mm rod.
Here some videos:
Moderate wind: https://youtu.be/QC80Ev-aL6k
Stronger wind: https://youtu.be/cp6HL0YoWEE
350mm radius: https://youtu.be/cXBZ0u_D9mc
License:
Creative Commons - Attribution




 menzenbach