

Magnetic Front-Mounted Light
 Perinski
February 14, 2025
Description
#### Magnetic Front-Mounted Light for Bambu Lab X1C,P1S
###
When this wonderful printer arrived, I immediately started exploring its features, print quality, and more. It turned out to be flawless, and in my opinion, there’s almost nothing to criticize. Maybe I haven’t worked with it enough yet, but so far, I’ve found no obvious flaws except for one: the lighting.
Some might ask, why bother looking inside when it prints so well? Here’s a simple example. Everyone, including you and me, has imperfect spools of filament, not just ideal ones. For instance, filament thickness can vary from 0.69 to 1.85 mm over several meters. Or, the color of the filament can fade due to high temperatures, becoming less vibrant. These are just two examples.
The LIDAR works great, but it calibrates based on the filament section used for the flow test. Subsequent layers of filament may end up too thin or too thick. That’s why it’s important to visually monitor the printing process, especially when using lower-quality filament.
#### The Lighting Issue
The printer’s side lighting is well-designed and provides a clear view of the layer placement. However, overall illumination is insufficient. A brighter, more uniform light is needed.
I considered buying a ready-made light. It’s inexpensive but uses a simple LED strip, causing each diode to create its own beam, resulting in multiple shadows. Therefore, the lighting must include a diffuser for uniform illumination. This not only makes it easier to observe but also enhances the quality of time-lapse recordings.
So, I decided to make a simple yet effective light for this printer and would like to share the process.
### Materials and Technical Details
#### Key Components:
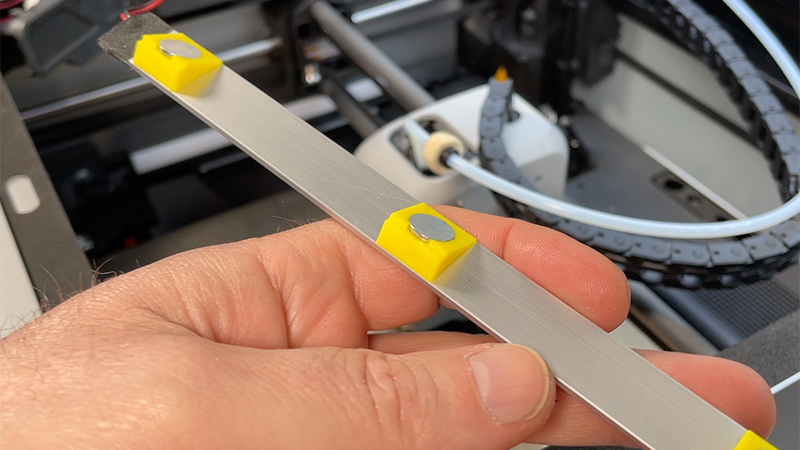
* 4 plastic brackets (structural parts for the light)
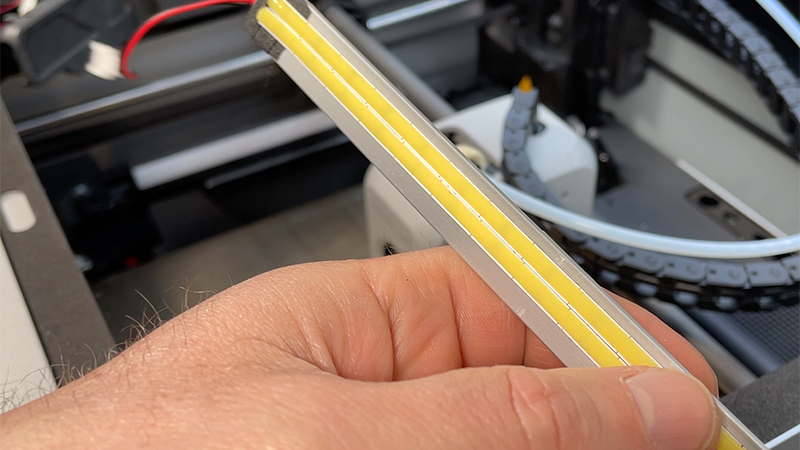
* Anodized aluminum bar (2 cm wide, 1.5 mm thick)
* 10 mm diameter, 1 mm thick magnets
* Insert nut sleeves (M2, 3 mm diameter, 2 mm height)
* Countersunk screws (M2, 4 mm length; 3 mm will also work)
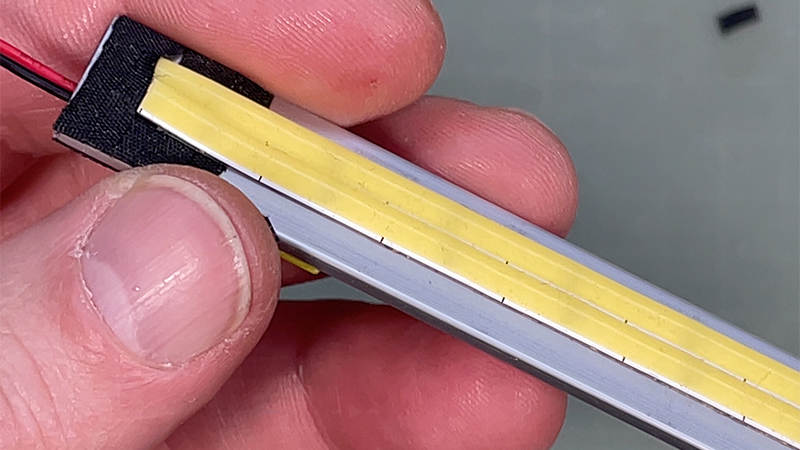
* Chip-on-board LED strip with compound coating (2 pieces, 64 mm each)
#### Dimensions and Installation:
The aluminum bar is 273 mm long. Why this length? I didn’t want to measure inside the printer, so I based it on the length of a commercially available light. I compared the parameters of available models, selected an optimal option, and decided to make my version.
After installation, the result was excellent. I was very pleased with the even and convenient lighting.
#### Power Supply:
* The LED strip consumes 440 mA.
* The printer’s technical documentation doesn’t specify the maximum load for its board, but based on my estimates, it can handle up to 1.5 A.
* The P1S model includes a USB port for lighting, rated for up to 1.5 A.
#### Important Note:
When building and connecting DIY solutions, you assume full responsibility. Replacing the printer’s board will cost €168. If you lack experience with electronics, it’s better not to take the risk.
#### Additional Materials:
* 5V LED strip with a color temperature of 6500K
* Connectors (I used small Molex connectors, but others can work too)
* Wires, a soldering iron, super glue for magnets
* Electrical tape and other small tools
### Bonus: A Simple Life Hack — Protecting the Glass from Tube Friction
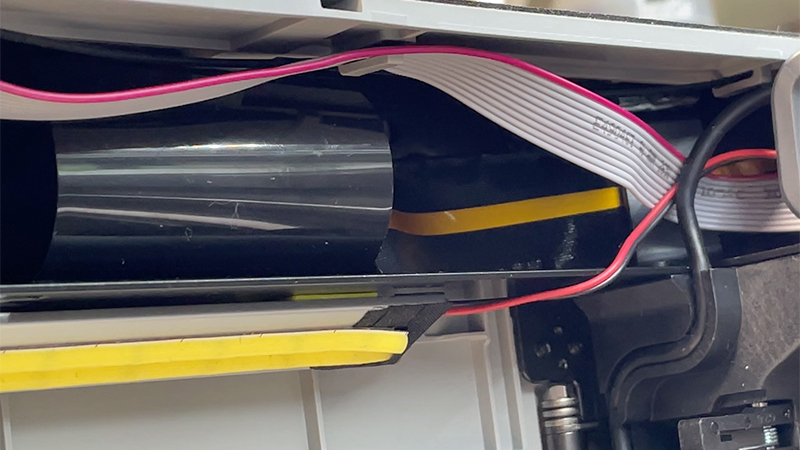
#### The Problem
During operation, the filament tube can rub against the printer’s glass, eventually damaging its surface. Additionally, filament vapors form a dense residue on the glass, which is difficult to remove. These contaminants can fall onto the print surface, compromising the quality of your parts.
#### The Solution
To prevent this:
1. Take a polishing felt disc for a Dremel or similar rotary tool.
2. Use a 4 mm punch and hammer to make a hole in the felt.
3. Install 4 rubber O-rings (3.5-4 mm inner diameter) on the sides to secure the felt.
4. Identify where the tube contacts the glass and place the felt disc at that spot.
Now the glass will stay clean, and the tube won’t collect residue to drop onto your prints.
* * *
If you’d like to replicate this design yourself—go for it! In my video, I show all the materials and the assembly process in detail. There’s also a link to purchase a ready-made light if you prefer not to build your own.
### Conclusion
Adding a front-mounted magnetic light for the Bambu Lab X1C is a valuable modification that improves print monitoring and enhances the overall user experience. A DIY light offers better illumination without having to modify the printer’s internals. Additionally, the glass protection hack helps keep the workspace clean and tidy.
**The model in 3MF format can be downloaded via [this link](https://makerworld.com/en/models/1107439) .**
##### See the [video](https://youtu.be/exBrzRWkcgs) for details:
[](https://youtu.be/exBrzRWkcgs)
**If you liked this thing - let me know by putting like!**
### Parts links below:
* [COB LED Strip 4mm DC 5V](https://go.like-it.link/vfXv1K)
* [Aluminum Flat Bar](https://go.like-it.link/qSVzJi)
* [Magnet D2,4,5,6,8,10mm X 1,2,3mm](https://go.like-it.link/vkBSq4)
* [Head Flat Screw M2 M2.5 M3 M4 M5 M6](https://go.like-it.link/fxNl3)
* [Inserts Nut M2-2.5](https://go.like-it.link/UrqWe)
* [Flexible Silicone Wire 30/28/26/24/22/20/18 AWG](https://go.like-it.link/0Bs4k)
* [Connector MX2.0 2.0mm](https://go.like-it.link/LoYdRx)
* [Wool Felt Polishing Buffing](https://go.like-it.link/S2WXWx)
* [BIGTREETECH Panda Lux LED Light Bar](https://go.like-it.link/zp13hj)
* [eSUN eABS+HS](https://go.like-it.link/bpb00)
### Links to used tools:
* [Heat Insert Nut Iron Tip](https://go.like-it.link/PzjsQF)
* [NOGA deburring tool and Blades](https://go.like-it.link/h5jhx)
### My favorites:
[](https://like-it.link/favorites)
#### Thank you for every tip or donation,
it means great recognition for me and helps a lot to keep going!
[](https://www.paypal.me/perinski)
[https://ko-fi.com/perinski](https://ko-fi.com/perinski)
**BTC:**bc1qplpzq36ghw84hty4nn2zzu4ps4sdh4th0v93j8
**ETH:**0xc766ebbeAa76aaf629788c8F99C33A8d80d48977
### My some other things:
[](https://like-it.link/thingiverse)


